blog»Conversion Rate Optimization»How to Use the Ptengine Shopify Integration: A Step-by-Step Guide
How to Use the Ptengine Shopify Integration: A Step-by-Step Guide
2025/04/21
You can read this article in about 15 minutes
If you run a Shopify store, you already know that getting traffic isn’t the hard part—it’s converting that traffic into real sales. That’s where the Ptengine Shopify App Store integration can make a big difference.
With Ptengine, you don’t just get data—you get tools to take action. From heatmaps and A/B testing to popups and personalized content, Ptengine helps you understand what’s working and optimize your store for better results.
In this guide, we’ll walk you through how to actually use Ptengine with Shopify—step by step. Whether you’re just getting started or ready to run experiments, this article will help you turn insights into real improvements.
1. Getting Started with the Ptengine Shopify App
Getting set up is quick and code-free. Here’s how to connect Ptengine to your Shopify store in just a few minutes:
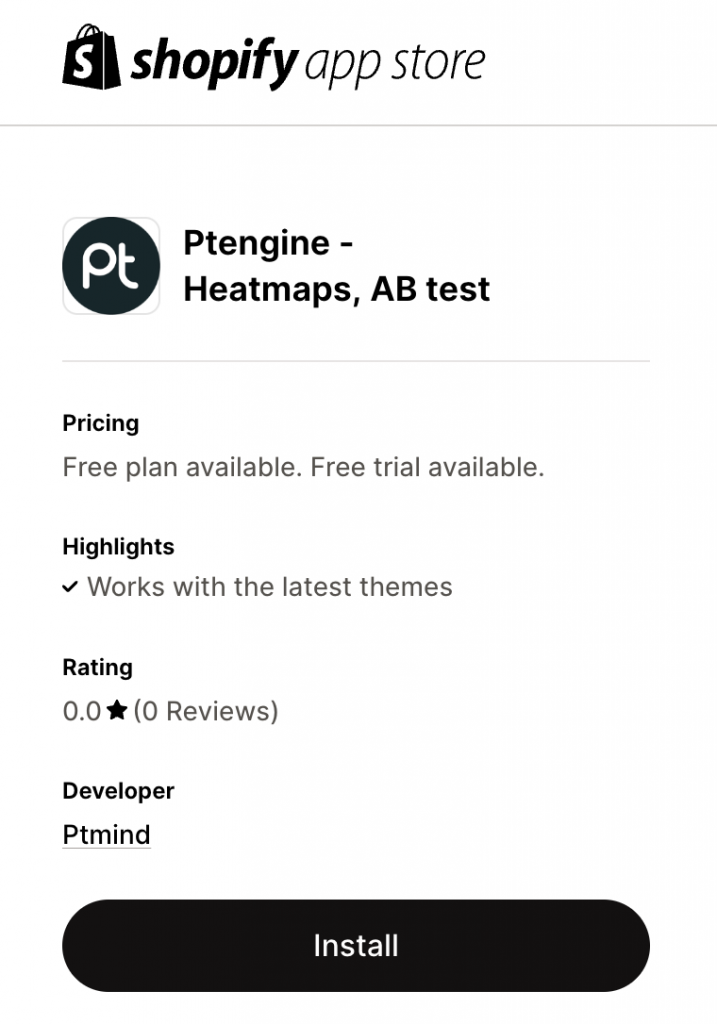
Step 1: Install the App
Head to the Ptengine Shopify App Store and click Install. You’ll be guided through a simple setup process inside Shopify.
Step 2: Connect Your Store
Once installed, Ptengine will automatically detect your store and guide you through selecting or creating your first Project. A Project is where your data and tools will live.
Step 3: Tracking Code – Done for You
Unlike other analytics tools, Ptengine auto-installs the tracking code—you don’t have to copy-paste anything. Tracking begins instantly once your project is active.
Step 4: Open the Ptengine Dashboard
Once connected, log into Ptengine to view your dashboard. You’ll start seeing real-time data right away—from page views and traffic sources to user actions and heatmaps.
Up next, we’ll explore how to use your Ptengine dashboard to uncover insights and start optimizing your store.
2. Navigating the Ptengine Dashboard
Once you’ve connected the Ptengine Shopify App Store integration, your next stop is the Ptengine dashboard—your control center for optimizing your store.
What You’ll See First
Right after setup, Ptengine starts collecting data instantly. Inside the dashboard, you’ll see a live overview of your store’s activity, including:
- Real-time visitor counts
- Traffic sources (where your visitors are coming from)
- Top-performing pages
- Devices and locations used by visitors
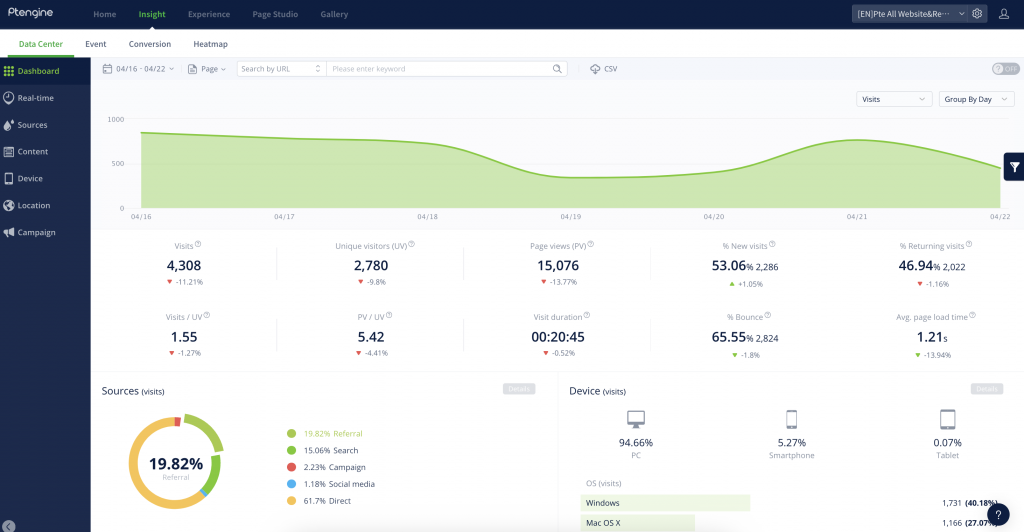
This gives you a snapshot of what’s happening on your store right now—with no extra setup required.
Using the Dashboard to Uncover Insights
Here’s how you can start exploring the data that matters most:
View Page Performance
Go to the “Pages” section in Ptengine Insight to see which Shopify pages are getting the most views and where users are spending the most time.
- Filter by product pages, homepage, or landing pages
- Compare bounce rates and time on page
- Spot high-traffic pages with low engagement (which are perfect candidates for optimization)
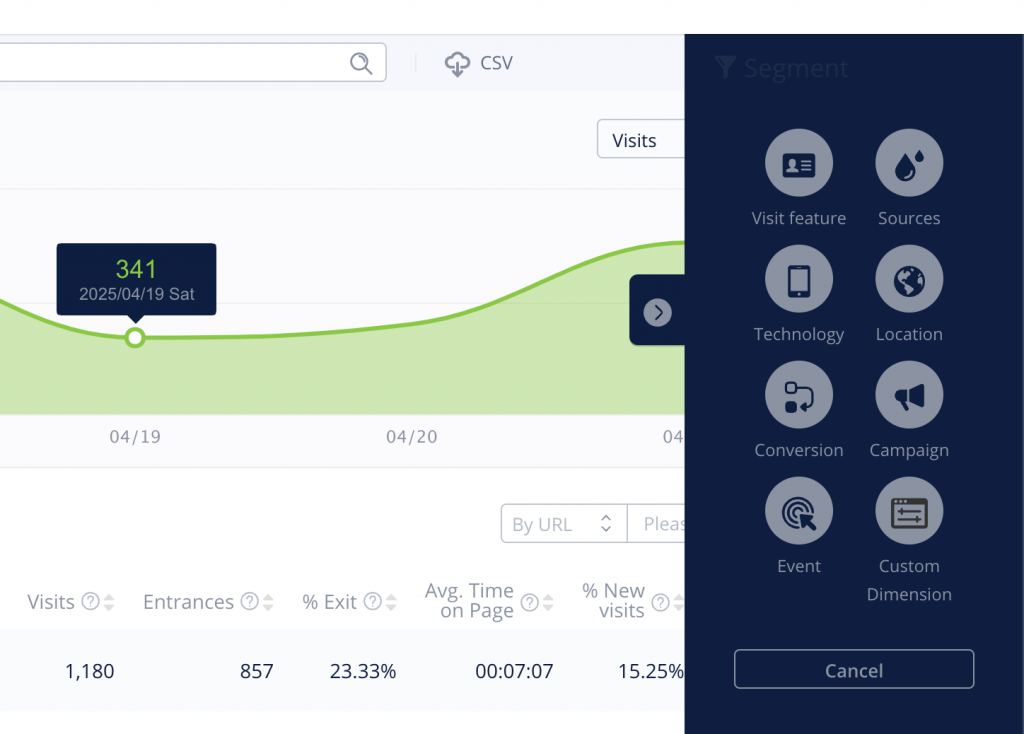
Segment Your Audience
Start filtering visitors by device, traffic source, or country to get a better sense of who your customers really are. This lays the foundation for personalization and better targeting later on.
3. Step-by-Step: Your First Optimization Flow
Now that your Ptengine dashboard is up and running, it’s time to put the data into action. In this section, we’ll walk you through your first real optimization task using the Ptengine Shopify App Store integration—from insight to improvement.
Let’s improve one of your high-traffic product pages by using heatmaps and A/B testing. Here’s how:
Step 1: Open a Heatmap for a Product Page
In your Ptengine dashboard, navigate to Heatmaps and select one of your most visited product pages. You’ll instantly see:
- Where visitors click
- How far they scroll
- What parts of the page they ignore
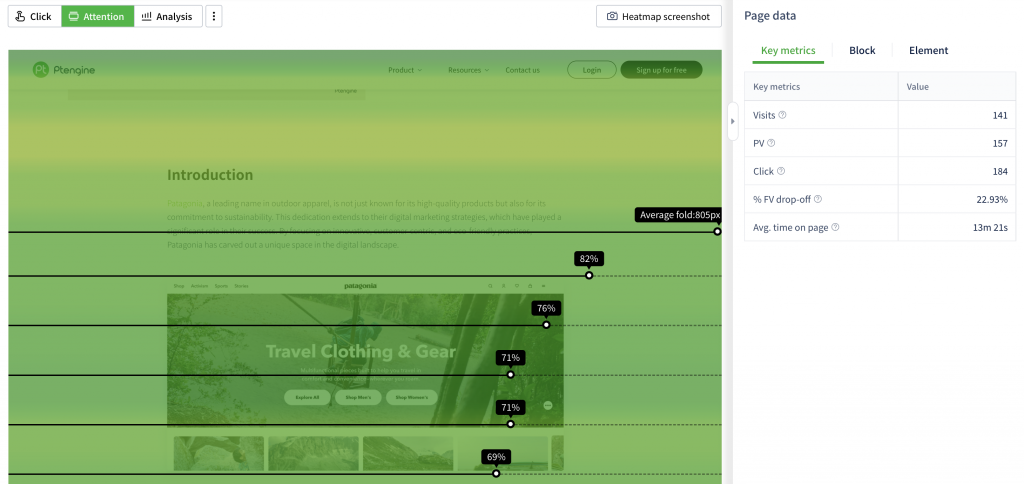
💡 Tip: If you notice users stop scrolling halfway down the page, they might never see your product reviews or Add to Cart button.
Step 2: Identify Opportunities to Improve
Use your heatmap insights to find friction points. Common ones include:
- CTAs that aren’t getting clicked
- Images or sections users skip over
- Important info placed too low on the page
These clues help you figure out what to change—based on real visitor behavior, not guesses.
Step 3: Launch an A/B Test (No Coding Needed)
Inside Ptengine, go to Experiments and set up an A/B test on that same product page:
- Use the visual editor to make changes—swap the CTA text, move images, shorten the copy, etc.
- Save the variant, name your test, and set your traffic split (e.g. 50/50)
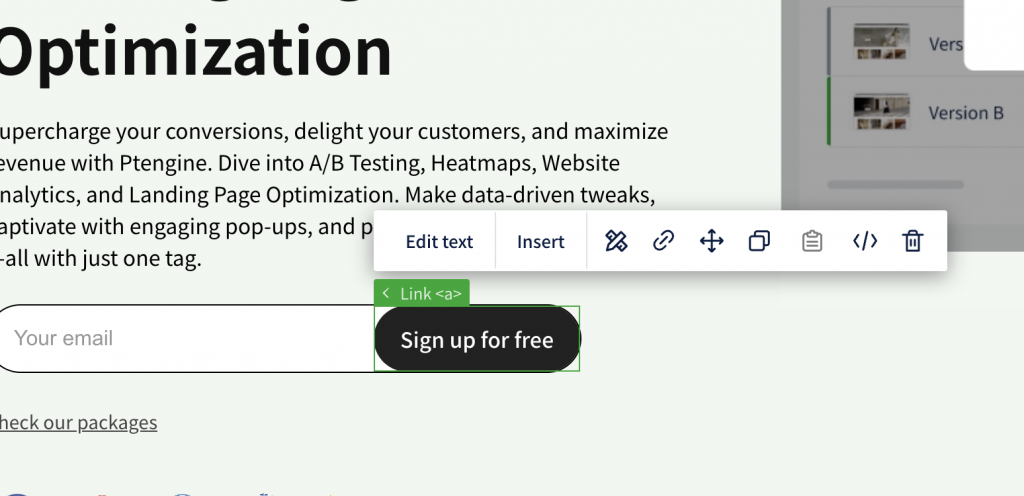
No developer required. Everything is drag-and-drop.
Step 4: Let Ptengine Do the Work
Once your test is live, Ptengine will automatically:
- Split traffic between the two versions
- Track which one performs better (e.g. more clicks, more add-to-cart actions)
- Declare a winner when there’s enough data
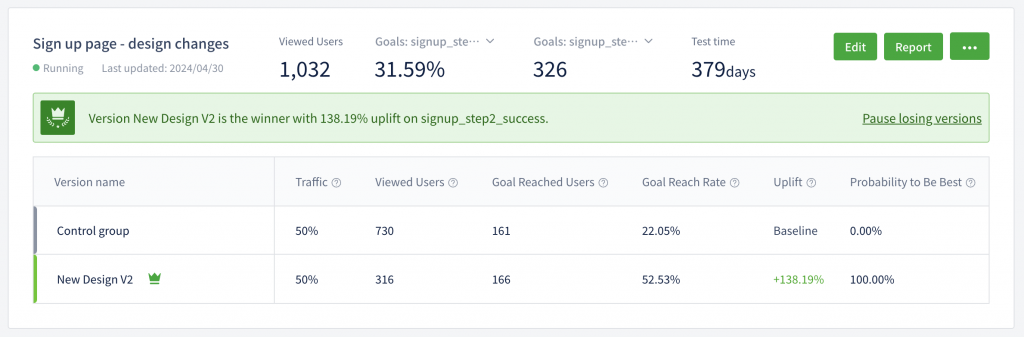
All you need to do is check back to see the results—then publish the winning version with one click.
This is just one example of how Shopify merchants can use the Ptengine Shopify App Store integration to improve their store step by step. Next, we’ll show you how to engage visitors with smart popups and keep them from leaving your store empty-handed.
4. Using Popups to Re-Engage Visitors Before They Leave
Even with great content and design, not every visitor is ready to buy right away. That’s where popups come in. With the Ptengine Shopify App Store integration, you can easily create targeted popups to re-engage visitors, reduce cart abandonment, and boost conversions—all without coding.
Here’s how to set up your first popup in just a few steps:
Step 1: Go to the Experience Module
Inside your Ptengine dashboard, head to “Experience”—this is where you’ll find tools for popups, banners, surveys, and more.
Click “Create New” and choose “Popup” from the gallery.
Step 2: Choose a Template (or Start from Scratch)
Ptengine includes over 100 pre-made popup templates, including:
- Exit-intent offers (shown when users are about to leave)
- Discount or free shipping promos
- Email capture forms
- Product recommendations
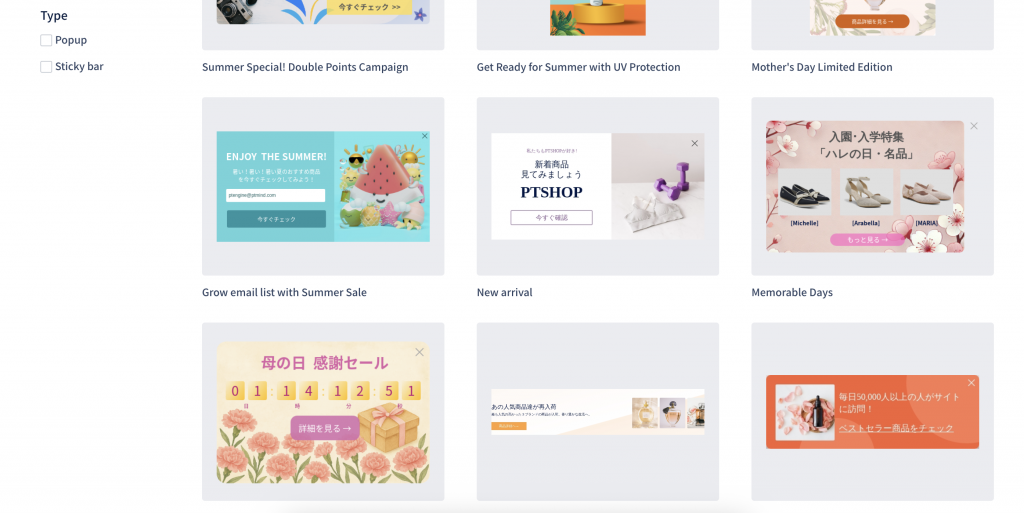
Pick a template that fits your goal—or start with a blank design and customize everything.
Step 3: Set Triggers and Targeting
Choose when and to whom the popup appears. You can trigger popups based on:
- Exit intent (when the mouse moves toward the browser bar)
- Scroll depth
- Time on page
- Inactivity
You can also target specific user segments, like:
- First-time visitors
- Returning users
- Users from specific traffic sources
- Cart abandoners
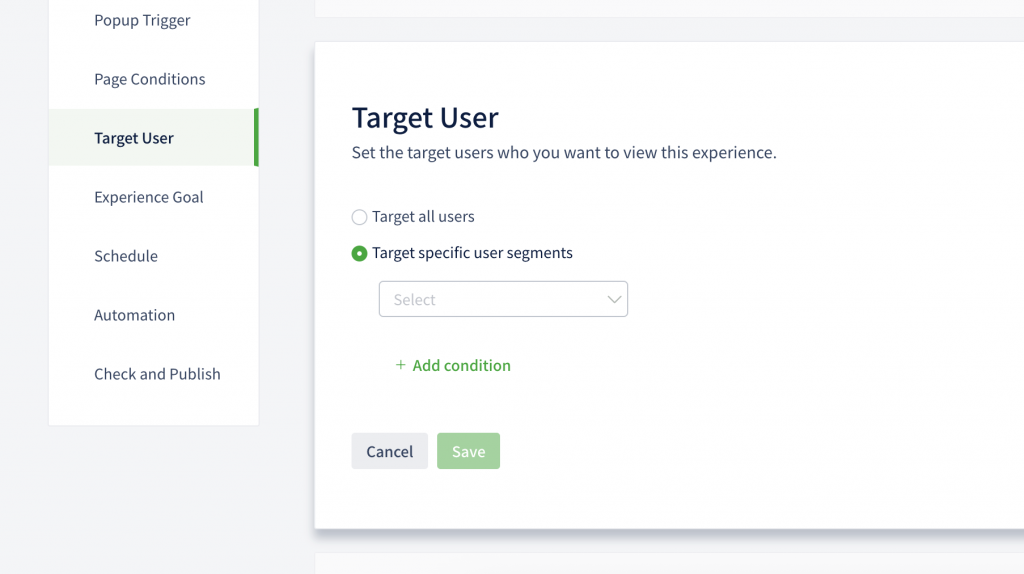
This allows you to create personalized experiences that feel helpful—not intrusive.
Step 4: Launch and Monitor Results
Once your popup is ready, hit “Publish” and it will go live instantly on your Shopify store. Ptengine will automatically track:
- Views
- Click-throughs
- Conversions (e.g. email signups, add-to-cart actions)
You can monitor performance in the dashboard and adjust timing, messaging, or design anytime.
Using popups with Ptengine is a fast and effective way to recover lost sales and guide more visitors toward conversion. And just like heatmaps and A/B testing, everything happens in one place—with no need for extra tools or plugins.
Next, we’ll show you how to track results, review what’s working, and continue improving.
5. Tracking Results and Continuing to Optimize
Once you’ve launched your changes—whether it’s a popup, A/B test, or a layout adjustment—it’s time to measure what worked and keep the momentum going.
With the Ptengine Shopify App Store integration, all your data is tracked automatically in one place. You can see not only what happened, but why it happened—and what to do next.
Step 1: Monitor Key Metrics in Real Time
Head back to your Ptengine dashboard and check the performance of your optimizations. You’ll see:
- Conversion rates (before vs after changes)
- Visitor behavior patterns (clicks, scroll depth, time on page)
- A/B test winners with statistical confidence
- Popup engagement (views, clicks, form submissions)
Use this data to spot what’s working and where there’s still room to grow.
Step 2: Double Down on What Works
When a change improves performance—stick with it. Ptengine lets you:
- Publish winning A/B test variants with one click
- Duplicate and tweak effective popups for other pages
- Compare segments to find high-performing audiences or traffic sources
Optimization doesn’t have to mean starting over. Build on your wins.
Step 3: Make Optimization an Ongoing Habit
The best-performing Shopify stores don’t just make changes once—they continuously test, refine, and improve.
With Ptengine, that process is fast, visual, and easy:
- Spot problems with heatmaps
- Fix them in minutes with the visual editor
- Test your changes
- Track results—and repeat
You don’t need a dev team. You don’t need to switch platforms. You just need the right tool—and now you have it.
6. Final Thoughts: From Insight to Action with Ptengine for Shopify
If you’re serious about growing your Shopify store, analytics alone aren’t enough—you need tools that turn data into action. The Ptengine Shopify App Store integration helps you do exactly that.
From the moment you install it, you’ll have everything you need to:
- Understand how visitors behave on your store
- Improve product pages using real data
- Test ideas without touching code
- Re-engage users before they bounce
- Continuously optimize for more conversions
All in one platform. All without needing a developer.
Ready to try it yourself?
Get started today and see how easy it is to make your Shopify store smarter, faster, and more effective.
👉 Install Ptengine from the Shopify App Store
👉 Learn more in our Help Center